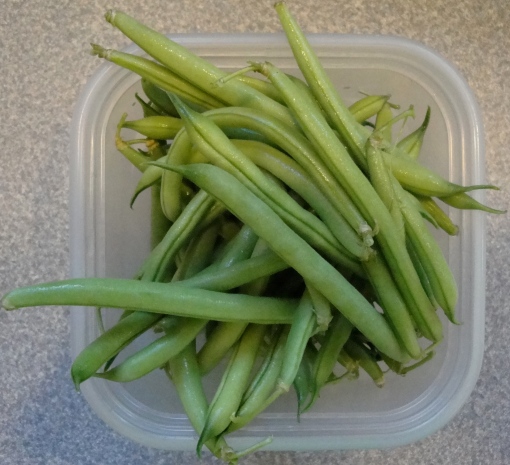
The garden, and gardening tasks, have definitely moved into a new phase during the past week.  Since writing my last post, I have harvested a pound of string beans and 2 pounds of squash.  Plus about a pound of cabbage and 2 cups of basil.  Oh, and 1 small yellow pepper, one jalapeno, and a scallion.  Plus a bunch of those little red onions, purplette, about twenty the size of a dime.  Still manageable, but I fear the worst.  Since Friday, the garden has required daily harvesting.  It’s amazing how quickly both green beans and squash can go from being not quite big enough to way too big.  Today I went out early, before the worst of the heat started, and after dinner.  In that time several squash went from too small, to just right, about 6-7 inches long.  You can let everything go for a day or two, but you will start to get beans and squash that are way too big.  Some stuff holds well in the garden, such as peppers and all the root vegetables.  But the beans, cukes, and squash need daily vigilance.

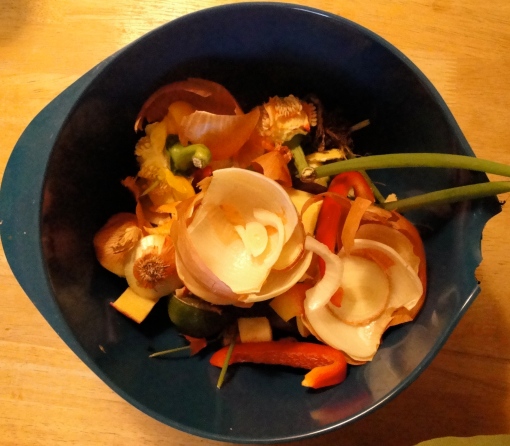
This summer I have made a commitment to myself to use my produce, give it away, or compost it.  Tonight while prepping the beans for a delicious string bean and carrot salad, I tossed several overgrown and too small beans straight into the compost bowl.  You have to harvest too large beans, or they will slow the production of your plants.  But you don’t have to eat them.  Last night while thinking about starting the Fall garden (not time yet, but soon), I read in The New Organic Grower, by Eliot Coleman, that bush beans are easier, and quicker, to harvest than pole beans, and I completely agree.  I tried to grow pole beans for a couple of summers, and found them completely annoying to harvest. With pole beans you have to keep going up and down, but with bush beans you just get down and work the patch, without the calisthetics.  The string bean and carrot salad that I made tonight, roughly based on a recipe from Soup makes the Meal, by…, used up all the beans, the yellowish pepper, and the scallion.  I steamed the beans, shredded 2 carrots from the fridge, chopped up the pepper and scallion, and then made a quick honey mustard vinagrette (with Dijon and cider vinegar).  I’ve been mashing a garlic clove into a paste for my vinagrettes lately, I think it adds a nice pungency.  Now I just have to figure out what to do with the squash.

While out in the garden getting parsley for the salad, I found a caterpillar!  It was on the parsley and teeny.  We’ve been observing the black swallowtails around the yard for a few weeks.  Not a lot, which is too bad.  I definitely noticed about 2 years ago that the butterfly population crashed.  I have several butterfly bushes and they used to be swarmed with butterflies all summer.  Not anymore.  Well, we’ll give this one a bit of protection from predators, at least.  In my parsley post I mentioned that we lost a caterpillar to drowning last summer, so this was a concern for me.  My solution was to use a bottle with a small mouth for the parsley, like a bud vase.  I’ll let you know how it turns out.

This is high season in my garden, it’s hard to know what to write about.  For all my loyal readers, I have to let you know that I’ve been having computer problems for the past couple of weeks, plus DH has been home in the evenings a lot for the past 3 weeks, which is unusual.  Thus my posts have fallen off a bit.  But I haven’t given up, we have an appointment at the Genius Bar this weekend, plus DH is back to his usual schedule.   I thought you’d all like an update on Robin’s Nest 2.  The above photo is of one of the current clutch who fell out of his nest this morning.  I heard flapping from the hops early in the morning, but didn’t get a chance to investigate until around 3 pm.  And there he was, although he was gone by the time my almost 10-year got a chance to check it out at 7:30.  He wondered where the baby Robin could have gone, and we can only hope that he finally got his wings and is in a tree somewhere.  He might have found a better hiding spot low down, or heaven forfend, a cat got him.  It was really hard to just leave him there, but that is what the experts recommend.

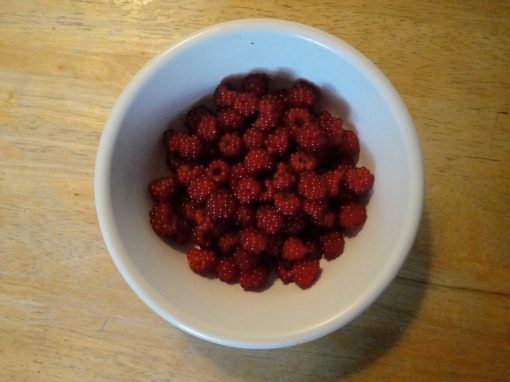
Today was also the first day that raspberries were ripe.  I probably could have left them for another day, they were a little tart.  That raspberry patch is probably the best thing I have done in the garden.  Every year around this year I get the most amazing raspberries, and there is nothing like the flavor of sun-ripened raspberries eaten off the brambles.  Because of how I have them planted, along a fence, most of the birds have a hard time getting them, so I have little competition.  The catbird is most expert at eating raspberries, and it really is a specialized skill.  We had one catbird who was here for years, enlivening our yard every summer with his charming song.  He was quite fearless of us, swooping in over our heads to gobble up raspberries.  I think he’s passed on, though he’s left behind some progeny.  We have a beautiful, young catbird now in residence, but I don’t think he’s quite mastered the art of eating raspberries.  Last summer I recall a baby catbird who tried really hard to eat the raspberries, but wasn’t too successful, and I think it may be the same bird.  Raspberry brambles are a lot of work to manage, plus they are very prickly.  For 2 weeks of summer bliss, I think it’s worth it, but be forewarned.

At the end of last summer I had moss growing in my main veggie bed and was concerned that I may have had a pH problem.  In February I got a pH and nutrient (NPK) test kit, and tested all of my veggie beds.  It was a huge project, but I discovered that the acidity was in the right range (6.5 to 7.5).  However the tests showed that the nitrogen was nonexistent and through further research I discovered that low nitrogen can cause moss.  So I went on a campaign of fertilizing my main be, adding all of our kitchen compost, plus Steve Solomon’s Complete Organic Fertilizer.  It wasn’t until later that I read that you can’t test soil for nitrogen too early in the season, because before the microorganisms kick into action with the warmer weather, little nitrogen is released.  Well, the fertilization seems to have done the trick.  That bed is simply out of control, everything growing in it is supersized.  I just noticed today that I already have beans forming, and each bean plant has about 40 blossoms.  And the squash, holy cow!  For those of you interested in the great sqash borer campaign, I will tell you that I have been spraying them religiously, after every rain.  It’s getting to be really hard, though, as the squash plants get huge.  I found myself hugging them today, those prickly devils, wondering if there isn’t a better way.  Maybe getting all my squash needs met at the farmer’s market?

Shortly after the first clutch of baby robins flew to the Mulberry Tree, I noticed Hector and Heloise “sneaking” nesting material into the hops vine on the opposite side of our yard from their 1st nest.  I know how territorial birds are, and also remembered reading that if the habitat is particularly good, birds will have multiple nests per season, so I wasn’t surprised.  This site, Project Nestwatch, says that Robins usually have 2 clutches per year, the second right after the first set fledges.  Which is just about what our Robins did, although I find it totally irritating that they chose the site that they did, because you cannot see the nest, it is so deeply buried in the hops.  I guess we annoyed them when we were incessantly watching and photographing them from the window for the last batch.  This current site does not to seem to me to be such a great spot, either.  It is right next to our driveway, and although we don’t drive down it, the kids ride their bikes and play right there, as well as I have potted tomato plants, and we kind of go in  and out and hang out right near the nest.  We were driving them absolutely nuts today, while I was trying to photograph them.  Too bad.  If they are going to nest in such a busy place, they are just going to have to get used to us.

One of my most cherished childhood memories is of finding wild blueberry bushes in the woods surrounding our campsite in New Jersey when I was about 8 years old.  I was already a lover of blueberries and to find them just a step away from our tent was a real thrill.  As an adult it has always been a dream of mine to have my own blueberry bushes.  My mother planted some (3, as recommended for cross-pollination) about 7 years ago, and they are 6 feet tall and provide all the blueberries she could want, with plenty left for the birds.  Birds love blueberries, especially bluebirds.  I know when my berries are almost ripe because they start hanging around.  If you don’t want to share your crop with the birds, you can easily net them since they do not get too tall.  However, I think their benefit to the wildlife is so important that I don’t mind sharing with the birds.  Right now my bushes are too small to produce much, so the birds are getting most of them.  But I can envision a future when there will be more than enough for us to get a share.

It took me a while to figure out where the best place to plant blueberries was in my yard, since they do get very big.  I discovered the variety, Northland, though, that only grows to 3 – 4 feet tall, which I am using in my foundation planting.  In addition to their culinary, wildlife value, blueberries also have fantastic fall foliage.  The different varieties have different colored foliage.  My favorite for fall color is is Jersey.  I’ve read that the flavor of the berries isn’t the best out there, but the color of its leaves are spectacular, rivaling burning bush.  In fact, it is recommended that one replaces their burning bushes with blueberries, since burning bush is actually a non-native and invasive.  Blueberries, on the other hand, are natives, and honestly, we can’t have too many!  Blueberry bushes are also easy to care for.  They do not have thorns and do not need much pruning.  Special care should be taken at planting to incorporate plenty of humus and amendments to the soil.  Blueberries thrive in acidic soil, so you may need to add sulfur to your soil to acidify it.  I did not do this, and I had some yellowing of the leaves until I added it.  You can also use peat moss when you plant your shrubs.

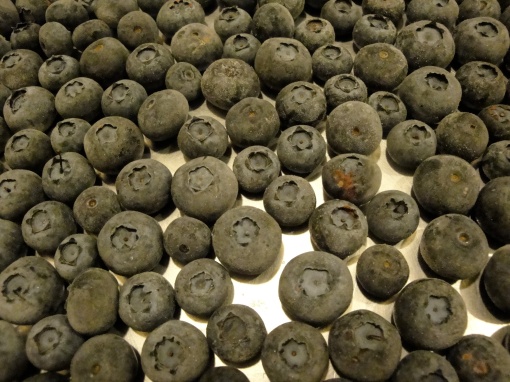
Ever since I started eating the fresh, local, in season blueberries from the Farmer’s Market I have not been able to eat supermarket blueberries.  Our Farmer’s Market is on Saturday, and yesterday I woke up with the need to go and get the blueberries.  I’m glad I did, it is high season and the farm I buy my berries from always has perfectly ripe, beautiful berries.  I bought 8 pints, and have frozen 6 of them to use offseason, especially in winter.  There’s nothing like them in blueberry muffins.  I like to think I make excellent blueberry muffins, and I know it’s because of these blueberries (oh, and a stick of butter).   I freeze the blueberries in a layer on a cookie sheet, and then transfer them to a ziploc freezer bag.  Last June I froze a lot more than I used this year, so I have a lot of left over now.  We’ve been talking about making smoothies with the extras, and I am contemplating jam.  I won’t just keep last year’s, though, because you have to figure the quality will suffer after a year.  I am looking forward to the day when I will have enough of my own blueberries to freeze for winter muffins.

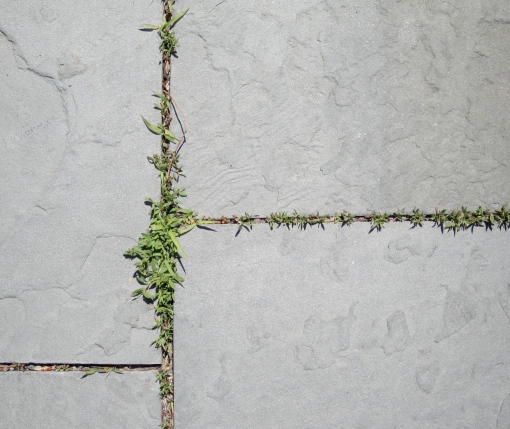
Because there never is an end to it in the garden, I have more thoughts on weeding.  I discovered a great organic technique for effectively dealing with the weeds that grow between the bluestone pavers in my front path.  Cider vinegar. Basically, I took cider vinegar and put it in little squeezer bottles, like the kind you see for ketchup and mustard, only clear.  I then squeezed it liberally between the pavers, using almost a gallon over all.  The photos here are before and after, the after being the next day.  I did it on a day when I knew it was going to be sunny, so the acid in the vinegar could really fry the weeds.  Although I don’t have a shot of it, it’s been a month since I did this, and there are no weeds.  The first year I tried this it worked just as well, but last year I kept putting it off, and then it rained for the month of June.  The weeds pretty much devoured the path, and because their roots were wedged between the pavers, they were incredibly difficult to pull out.  This made me extra motivated to do it in a timely fashion this year, although the weeds were still bigger than I wanted, it still worked.  The weather stayed nice for several days after I treated the path, and I have to tell you, it smelled quite vinegary until we had some decent rain.  I wouldn’t use this technique in my garden beds, because the vinegar could damage plants near the weeds, but it works great on pavement.

My summer squash are starting to get big, and it’s making me nervous.  In my garden, squash get killed by squash vine borers almost every year.  It drives me crazy because summer squash overproduction is a cliché of the vegetable garden, yet I’m lucky if I get one or two a plant.  Two years ago I thought I had solved the problem when I discovered the trick of putting aluminum foil as a mulch around the base of the plants.  Supposedly the foil confuses the squash vine bugs from laying their eggs.  The borer is the larva and it burrows into your squash vines and kills them from within.  Apparently the larva then bury themselves in your soil, then pupate in the spring and plant more eggs on your plants.  So unless you actually defeat the life cycle of this bug on your own property it will keep coming back, and you will never get enough summer squash.  The three ways you can protect your summer squash is by preventing the bugs from laying their eggs, preventing any eggs that are laid from hatching, and killing any borers that do manage to infest your plants if any do hatch and bore into your plants before they go back into your soil.  This is serious pest prevention work.

I’ve been trying for several years to outwit them and this past winter I went on a serious search for a remedy.  The foil seemed to work well 2 years ago because only one plant got it.  But I must not have deal with the borer from that plant, because the borer got all of my plants last year.  Come to think of it, I don’t know that I killed those borers before it got back into the soil.  I didn’t really understand the life cycle of this pest until my intensive research on it this winter.  I’m on a mission, now, I am fed up!  I’m taking my squash growing game to a new level.  The technique I decided to try this year is insecticidal soap.  I’m going to spray the squash vine with insecticidal soap on a weekly basis, and hope to kill the eggs before they hatch.  I don’t know how well I’m going to stay on top off it.  With the rain so unpredictable these days, it’s hard to know when the best time to do it is.  The soap I’m using is approved for organic gardens, but this does bring up a point about pest management.  Sometimes a pest is so difficult to deal with via organic methods that you need to have some kind of pesticides.  In agriculture they call it “integrated pest management”.  Basically they try to defeat pest problems before they begin, and only when the pest problem because unmanageable do they resort to pesticides.  In the small home vegetable garden, it’s easier to manage pests organically.  There aren’t that many bugs per plant and you can pick them off, or just wait for the beneficial insects to move in.

If you haven’t planted squash yet, there’s still time.  The best squash harvest I ever got was when I planted them really late, in August for a September/ October harvest.  A lot of summer squash take about 50 days to reach maturity.  That’s just 8 weeks.  Our weather can stay quite mild here until October, so if you plant at the end of July or beginning of August, you till have time for a harvest.  Another plus is that the dreaded vine borer usually only has one life cycle per year in this region, so by planting late you could possibly avoid this pest altogether.  I’m also trying another squash trick this year that I read about on Vegetable Gardening.  Since squash need a lot of water, the author of this article buries empty gallon sized pots in her squash hills in order to be able to water them well and deeply.  Steve Solomon has a tip similar to this which he calls fertigation (p. 153 in his book Gardening When It Counts)  He takes a bucket, puts a little hole in the bottom, then fills it with manure or compost tea, and sets it next to a plant and lets it drain out.  I figure I could add compost tea, or Seaweed extract to the pots I have set next to my squash (and cukes).  I’ve also planted several kinds of summer squash this year, partly thinking that one might be more attractive to the borers than the others and could act as a pest magnet.  One thing is for sure, I am going to be ruthless this year, and if the borer gets into one of my plants I’m going to rip it out right away and squash the heck out of the borer.  Seems fair, doesn’t it?

After I wrote my last post about weeding, I realized that I created a somewhat menacing outlook.  That steamy morning of weeding must have really affected me, because I usually have a very laid back and relaxed attitude about weeds.  I had to laugh when I reread about liking to weed when they are at least an inch high.  Yeah, right.  Maybe in the veggie garden, where I am definitely more on top of weeding, but in my perennial and shrub beds?  Let’s just say the weeds achieve a somewhat more mature size, say 6” to a foot, before I feel really compelled to get to them.  I find it kind of satisfying to let a bed get out of hand before I tackle it.  It’s like the feeling you get from cleaning a really dirty bathroom.  It just looks so much better after the clean-up, it almost highlights the beauty of your garden more if you let it get overgrown and messy and then attack it.

I guess you could say that weeding has been on my mind lately.  The flurry of May planting is over, the summer veggies are in but have not started producing yet, most of the annual flowers are also in.  I have a few leftover plants that I need to find spots for, but of course, any open areas in my garden are covered in weeds right now.  So before I can plant anything, I have to clear the soil.  It’s a good practice to try to fill all available space with plants you want, as a way of controlling the weed problem.  My established perennial beds get very few weeds, because the perennials cover all the bare soil.  The weeds really do just colonize bare soil, which is why everyone tells you to mulch if you want a carefree, neat garden.  I’ll mulch some areas, but mulch does interfere with the self-sowers, and it’s a lot of work to lay down the mulch.  I mostly do the beds in front of my house, and hard to reach areas.

A friend of mine does these amazingly detailed and beautiful pen and ink drawings, which she calls “knitting”.  Weeding is like knitting for me.  I’ve been doing it long enough that it doesn’t require a lot of my attention, so I can just sit and gather wool, and listen to the birds.  Recently my husband observed me “weeding”, sitting on my little stool gazing about, and suggested I read his meditation book.  I suppose that is what I am doing, but it is an outward directed meditation and not an inward directed one.  In those moments, the most pure in my gardening, I am just being in the garden.  Weeding is a great way for you to literally get, or be, in touch with your plants.  And, after all, isn’t that why you garden?  To have beautiful plants and flowers to look at whenever you want? To create a beautiful and comfortable place to spend time outdoors, in the nature?  Weeds never become a total disaster if you spend a lot of time in your garden, because you will catch anything before it gets truly out of hand.  And the definition of “out of hand” is your own.  No matter how messy it gets, it is still glorious to be outdoors.

One of the magical, yet mundane, tricks of a beautiful and productive garden is this commonly repeated gardening rule.  It’s very direct, yet somehow mystical.  Feed the soil?  But what does soil eat?  How does it eat?  The fact is, soil is kind of a multi-species organism, a kind of meta-organism.  It’s kind of funny, because soil, otherwise known as dirt, has the aura of being inert.  After all, it just sits there under our feet.  It’s not unreasonable to think of it as just the medium that holds plants in place.  But when you get right down into it, examine it and get to know it intimately, you start to bond with your dirt.  I once took a class at the New York Botanical Gardens called Soil Science I.  Yes, there was a Soil Science II.  As a matter of fact, I just looked it up and there are 63 colleges in the US that offer majors in soil science.  There is even a Soil Science Society of America.  You’ll take my word, then, that caring for your soil is serious business.  Okay, so how do you feed your soil?  It’s a simple practice that can become a somewhat arduous, occasionally all consuming, enterprise.  Once you start feeding your soil organically you begin to understand the appeal of Miracle Grow, electric kool-aid for plants.  For those of us who want to garden organically, but need an instant boost, we have Fish and Seaweed Extract.  If you’ve never used this, trust me, you are in for a treat.

Basically, the way you feed your soil is to add compost.  Every gardening book under the sun will tell you to do this, and how to do it, ad infinitum.  So just do it, you’ll be glad you did.  We were afraid of rats when we started gardening here, so we started just making leaf mold, basically taking all our fall leaves, putting them in a bin and waiting about a year and a half.  Well-rotted leaf mold is pretty sweet.  But a couple of years ago, we just couldn’t bear to throw away our kitchen scraps anymore.  We bought a couple of plastic compost bins from our town, got a good intro to town composting from our town’s environmental affairs officer, and away we went.  At first, the most satisfying part of starting to compost our kitchen waste was seeing how much we were reducing our contribution to the landfill.  When composted, veggie scraps just seem to melt away.  And then, after about 9 months, jackpot!  Nice brown food for our garden.  There are probably about as many ways to compost as there are gardeners, so you’ll have to create your own system.  There’s even a very informative book, dedicated to composting, called Let It Rot.

One of my organic gardening gurus, Steve Solomon, says in his book Gardening When It Counts:  Growing Food in Hard Times,  that simply using compost from your own garden and kitchen will not return enough nutrients to the soil to grow the most nutritious food.  Why?  Well, for one, if we eat out of our garden, we remove nutrients from the soil and don’t return them.  Crudely, we pee and poop the nutrients from our garden into the sewer system.  Steve says “I compost only to recycle garden and kitchen waste.” (p. 180)  In addition to his own compost, he adds well decomposed feedlot manure as well as small amounts of what he calls COF, complete organic fertilizer, an organic soil amendment that he formulated to increase the nutritional content of homegrown vegetables.  I won’t print the formula here, but it is on page 21 of his book, go check it out at the library, surreptitiously copy it at the bookstore, or even buy his book, which is awesome.  Steve Solomon is the slightly cantankerous garden gramps that many of us don’t have, but could sure use.  In addition to his gardening books, he started a cool website, called the Soil and Health Library.  I use Steve’s COF, my own leaf mold and compost, Fish and Seaweed Extract, and more recently, Vermont Compost Company’s Manure Compost , which Richfield Farms in Clifton carries. Since I don’t have access to manure, nor am I really interested in finding one, this is one way that I can add manure to my garden.  It’s not cheap, though, so when the Hard Times that Steve predicts come, I’ll have to find another system.  Maybe Humanure will become more appealing then.

About a month ago, I had a friend over to see my garden.  She wants to garden and I was trying to get her to just go for it.  As I was showing her my main veggie bed, which at that point I had not started planting out and was absolutely covered in weeds, she turned to me and asked, but what do you do about the weeds?  I responded, I sit on my little weeding stool and pull them out.  But what struck me most about her query was the expression on her face.  She seemed so dismayed at the thought of weeding.  At that moment I decided to write a post about weeding, with the intention of telling her, and other gardeners, do not fear the weeds!  I planned to call the post something like, the zen of weeding, or the weeds are not out to get you, or the joy of weeding.  Then, this week, as I approached my burgeoning weed problem on a hot humid sunny day, I changed my mind. Weeding sucks!  The truth is, weeding can be the most satisfying of gardening experiences, and the biggest ordeal.  The time and weather conditions of your chosen time of weeding can have a huge effect on your experience, as well as the growth phase of the weeds.  I had chosen the worst possible weather to confront my weeds, just sitting out there was killing me, forget about the added torture of bending and pulling weeds.  A cooler, cloudy day would have found me enjoying the same activity.  Also, had I not neglected the duty, or had the weeds not turned so quickly from tiny little motes to aggressive green monsters, it would not have been such a chore.

However, in many ways, aside from the bad weather conditions, it was a good time to weed.  It was before the weeds had completely taken over, overwhelming all of my veggie plants, but after they had gotten big enough to easily grasp and pull.  I will pull itty bitty weeds, if there are not too many of them, but I like them to be at least an inch or more in size, to give me more to grasp.  Weeding tiny seedlings feels like combing lice out of a child’s hair.  I have at times used a technique similar to hoeing when I have a big area with teeny weeds, scaping the edge of my trowel.  This technique only works in certain areas of my garden though, because I have been gardening with self-sowers for many years now, and some of the “weeds” are actually the seedlings of annual flowers that I like to have in the garden.  Cleome, Verberna boriensis and hastata, Echinacea, corydalis are my main self-sowers, but there are a number of other “weeds” that I like to keep around.  Last year I planted borage, as a beneficial plant, and this year it came back gangbusters.  I also have some volunteer sunflowers this year.  One challenge of weeding when you have self-sowers is that you have to know what each of these self-sowers look like.  You have to be able to selectively weed, leaving some seedlings but removing most.  You have to thin the self-sowers or else they get too crowded.  They add a delightful aspect to weeding, though, a kind of treasure hunt.

Before I had a garden, I was an amateur naturalist, and spent many hours pouring over wildflower guidebooks.  I bring that attitude to my weeding efforts, too, trying to really identify every “wild” plant that I encounter in my tame garden.  In my early years of gardening, if I wasn’t sure if some plant was a “weed” or something more interesting, I would allow it to grow until it flowered.  I have had some dramatic failures with this system, such as when I let a patch of pokeweed have it’s way.  By the time I realized what I had unleashed in my garden, I had created a problem that took years to defeat.  Pokeweed is a native plant, and birds love it, but it’s bad in the veggie and ornamental garden, because established pokeweed has a deep root that’s hard to remove and the berries are poisonous for people. This is just one example of a weed that needs to be dealt with alacrity.  Tree weeds are important to stay on top of, because once they’ve become established, you will not be able to pull them out. Bindweed, bittersweet and wild wisteria vines must be dealt with aggressively, but the worst in the book is poison ivy.  If you don’t know what poison ivy looks like, school yourself.  If you are attracting birds to your garden, you will get it because they eat the berries and then poop out the seeds.  It won’t become a problem if you stay on top of it, but you must be vigilant.

When I was a kid, we never ate chard.  But while working on a fishing boat owned by the Moonies (long story), I was introduced to this delicious green.  It’s such a beautiful vegetable, especially red chard, that when I finally started vegetable gardening, I had to try it.  Unfortunately, for some reason, I couldn’t get the red variety to grow.  Oh, it would grow, sort of, but never the glorious bunches shown in all the catalogues and vegetable gardening books.  So even though I have a decent plot, I’d find myself buying swiss chard at the market.  Then a few years ago the store started carrying a white stemmed green chard that always looked way better than the red chard, and I thought I might be able to figure out what variety it was and grow it.  And I did, and I have been having amazing success with chard ever since.  This vigorous variety is Fordhook Giant, an oldie but goodie. I usually harvest the outer leaves regularly throughout the growing season, and it just keeps growing and growing, from early spring until after the first frost of fall.  I’ve read that in more mild climates it will grow all through the winter, and I wonder if with some protection I could keep it going.

I’ve been starting my chard indoors in February, with my onions and lettuce, to get the earliest jump on the season.  However, last fall while experimenting with my cold frame, I planted swiss chard seeds.  They never germinated and I forgot all about them.  Then in early March, while checking things out, I noticed the chard growing.  At first I thought, what the heck is that and how did it get there?  But then my creaky middle-aged brain finally kicked in and a vague recollection of planting chard seeds appeared.  I continued to plant my planned patch this spring, but let those fall sown plants grow.  I have to say, they are bigger and more vigorous than the ones I started indoors.  I also found a couple of “spontaneously generated” chard plants in my other bed.  Did I plant them or are they self-sown?  We will never know, but they, too are very strong.  So I think that chard is probably better directly sown in the soil, although I did do that my first year growing Fordhook Giant, and the reverse seemed to be true.  Maybe the answer is that chard seeds like to sit in the soil all winter, and then germinate?  That seems like leaving your chard production up to a lot of chance, and I don’t know if I have the courage for that.  If I tried that system, I’d probably still start them indoors to hedge my bets, and then wind up with even more chard than I have now, (which is 20 plants).  DH says, do we really need that much chard?  Maybe not, but I’m sure my friends and family will be happy in about a month or two.

The biggest problem I have with chard is those pernicious leaf miners.  They have destroyed a lot of lovely leaves with their tunnels.  I bought some floating row covers this year, thinking I would cover my plants to protect them from this pest, but when it came down to it I’d rather see the plants than the covers, and take my chances with the bugs.  I read somewhere that the best way to defeat the leaf miners (other than row covers) is to be really vigilant about removing infested leaves, and throwing them out in the garbage (not composting).  I’d hate to jinx myself, but that’s what I’ve been doing this year and it seems to be working.  I just had my first big harvest this week, and it was delicious.  I cooked it with onions and garlic in olive oil, and then threw in some capers and chicken broth at the end and served it over pasta with some parmesan.   I like it to be completely wilted because the leaves can sometimes be a bit bitter, but that’s tamed if you cook it thoroughly.  Last year I discovered that it is especially good if you with shitakes, but it is also good just cooked with garlic and oil.  For anyone who wants to read even more about this leafy green, I recommend the following post on the blog, In My Kitchen Garden, which has pretty much everything you need to know about chard.

http://inmykitchengarden.blogspot.com/2007/09/how-to-grow-swiss-chard-from-seed-why.html

Finally, when harvesting the chard I use the same technique I talked about in my broccoli raab post.  I harvest the leaves in the morning and stand them up in a bowl of water.  They will keep this way for at least 3 days, maybe more, and instead of languishing in the fridge, will be an active reminder for you to cook it.